
A failed print is a core part of the 3D printing experience. It happens. What separates frustrating guesswork from efficient problem-solving is your diagnostic process. When you find a pile of spaghetti or a warped part on your build plate, the temptation is to jump into the slicer and start changing every setting. Stop.
Changing multiple variables at once is the fastest way to get lost. A successful triage process is about isolating the problem. Every print failure can be traced back to one of four root causes: the Hardware, the Material, the Model, or the Slicer. By testing them in a logical order, you can pinpoint the exact issue, fix it, and get back to printing.
This guide provides a hands-on, technical framework for diagnosing your next failure.
The Triage Framework: Test One Thing at a Time
Your goal is to isolate the variable. Before you touch a single slicer profile, you need to confirm that your machine and your material are in a known good state.
Here is the most efficient order of operations for troubleshooting:
- Material: Is the filament itself compromised? This is the most common cause of sudden print quality degradation.
- Hardware: Is the physical machine functioning correctly? This covers everything from bed level to nozzle clogs.
- Slicer: Are the G-code instructions correct for your machine and material? This is where you tune settings.
- Model: Is the source 3D model (STL, 3MF, STEP) valid and printable?
Start with the easiest and most frequent culprits first. A perfect slicer profile cannot fix a wet spool of filament.
Category 1: Material Failures (The Usual Suspect)
If you had good prints yesterday and bad prints today using the same G-code, the problem is almost certainly your material. Filament, especially PETG, Nylon, and TPU, is hygroscopic. It actively absorbs moisture from the ambient air.
Key Symptoms of Wet Filament:
- Audible popping or sizzling from the hotend as moisture inside the filament instantly turns to steam.
- Excessive stringing and oozing, even with dialed-in retraction settings.
- Rough, textured, or “fuzzy” surface finish.
- Extremely poor layer adhesion and brittle, weak parts that snap easily along layer lines.
- Under-extrusion or gaps in the print as steam pockets create voids.
The Diagnosis & Solution: Dry Your Filament
Do not skip this step. Even brand-new, vacuum-sealed filament can contain moisture from the factory. The single best investment you can make for print quality is a dedicated filament dryer. A food dehydrator can work, but a purpose-built unit offers better temperature control and ergonomics.
The Creality Space Pi Filament Dryer is an excellent example. It features precise temperature control up to 65°C and a built-in timer, making the process repeatable and safe for different material types.

Creality Space Pi Filament Dryer
Pros
- Accurate temperature control for various filaments.
- Compact design fits easily on a workbench.
- Set-and-forget timer prevents over-drying.
Cons
- Only holds a single 1kg spool.
Baseline Drying Recommendations:
| Material | Temperature | Drying Time |
|---|---|---|
| PLA / PLA+ | 50 °C | 4 - 6 hours |
| PETG | 65 °C | 6 - 8 hours |
| ABS / ASA | 65 °C | 6 - 8 hours |
| TPU | 55 °C | 8 - 12 hours |
| Nylon / PA | 70 °C* | 12+ hours |
Note: Some dryers, like the Space Pi, max out at 65°C. This is sufficient for most hobbyist materials but for engineering-grade Nylons, a higher-temperature solution may be needed.
Once your filament is confirmed dry, run a small test print. If the problem persists, you can confidently rule out material and move to the next category.
Category 2: Hardware Failures (The Mechanical Check)
Hardware issues are physical problems with your 3D printer. These often appear as geometric inaccuracies, layer defects, or complete print failures. For a thorough check, consult the complete 3D printer maintenance tips guide.
First Layer Problems
Your first layer is everything. If it fails, the entire print is doomed.
- Symptom: Print won’t stick, warps, or gets knocked loose. The first layer is blobby, too thin, or stringy.
- Diagnosis & Fix:
- Clean the Build Plate: Oils from your fingers are the enemy of adhesion. Clean your PEI or glass bed with 91%+ Isopropyl Alcohol (IPA) and a lint-free cloth.
- Check Bed Level (Tramming): The nozzle must be an equal distance from the bed at all points. Manually level the corners or run your printer’s auto-leveling routine.
- Verify Z-Offset: This is the most critical first-layer setting. The nozzle needs to be the right height from the bed. Too high and the filament won’t stick. Too low and it will clog. The ideal Z-offset creates a neatly “squished” line of filament without being completely transparent.
Layer Shifting
- Symptom: The top part of your print is offset from the bottom along the X or Y axis.
- Diagnosis & Fix:
- Check Belt Tension: Power down the printer. Pluck the X and Y belts like a guitar string. They should have a low-frequency twang, not be slack or overly tight. Most printers have built-in tensioners.
- Check Pulley Grub Screws: Find the pulleys on the X and Y stepper motors. Ensure the tiny set screws (grub screws) are tight against the flat part of the motor shaft. A loose one will cause the pulley to slip.
- Check for Binding: Power down and move the print head and bed by hand through their full range of motion. Do you feel any tight spots or resistance? This could indicate a misaligned rail or debris on the wheels/linear rails.
Extrusion Issues (Clogs and Jams)
- Symptom: Filament stops coming out of the nozzle mid-print. You hear a clicking or grinding sound from the extruder. The print has gaps and missing layers.
- Diagnosis & Fix:
- Partial Clog: A tiny piece of debris or burnt filament is restricting flow. Heat the nozzle to 240°C and manually push filament through. If it curls or comes out thin, perform a “cold pull” (also called an atomic pull) to clear the obstruction.
- Heat Creep: The “cold” side of your hotend is getting too hot, causing filament to soften before it reaches the melt zone. Ensure your hotend fan is running at 100% and is not obstructed by dust.
- Extruder Tension: The gear that pushes the filament may be too tight (grinding the filament) or too loose (slipping). Adjust the tension arm screw.
- PTFE Tube: In Bowden setups, ensure the PTFE tube is fully seated in the hotend and extruder fittings. Friction inside a worn tube can also cause under-extrusion.
Category 3: Slicer Failures (The Digital Instructions)
If your material is dry and your hardware is mechanically sound, it’s finally time to look at your slicer settings. Slicer issues usually manifest as quality problems, not catastrophic failures. Modern printers and slicers have excellent default profiles, but they may need tweaking for specific models or materials.
A machine like the Bambu Lab P1S minimizes a lot of this tinkering. Its integrated hardware and software, combined with well-tuned material profiles, deliver exceptional quality out of the box. This lets you focus more on printing and less on troubleshooting slicer variables. However, understanding these settings is crucial for any printer.
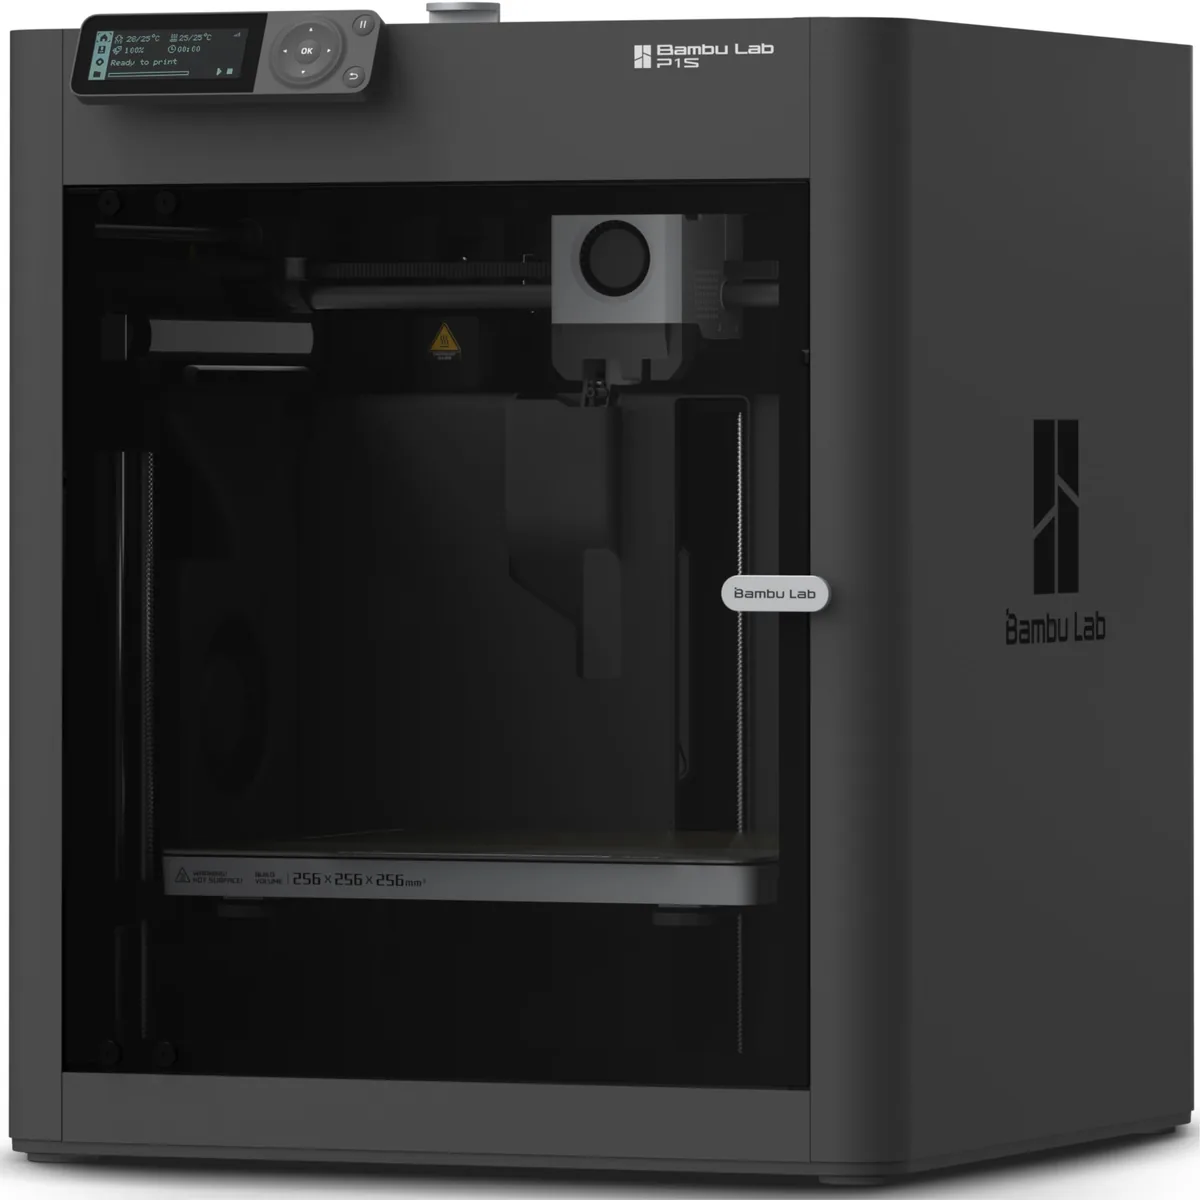
Bambu Lab P1S Enclosed 3D Printer
Pros
- Fully enclosed CoreXY chassis with auxiliary cooling fan, Smooth multi-color / multi-material integration with Bambu AMS, Reliable out-of-the-box first layers with dual automated bed leveling, Active vibration compensation and belt tension monitoring
- Enclosure enables reliable printing of ABS, ASA, and more.
- Highly polished user experience from slicing to printing.
Cons
- Proprietary closed ecosystem
- Chamber is passively heated by the bed rather than a dedicated PTC heater
- Upgrading to hardened nozzle for carbon fiber requires separate swap
Temperature and Speed
- Symptom: Stringing, blobs (too hot) or poor layer adhesion, dull finish (too cold). Corners are rounded, details are lost (too fast).
- Diagnosis & Fix: Print calibration models. A temperature tower will show you the ideal nozzle temperature for a specific filament spool. A max flow rate test will tell you how fast your hotend can melt plastic, setting a hard limit on your print speed.
Retraction
- Symptom: Persistent stringing or zits/blobs on the print surface, even with dry filament and correct temperatures.
- Diagnosis & Fix: Retraction pulls filament back slightly during travel moves to relieve nozzle pressure.
- Direct Drive: Start with a retraction distance of 0.5mm - 1.0mm and a speed of 30-40 mm/s.
- Bowden: Start with a retraction distance of 3mm - 6mm and a speed of 40-50 mm/s.
- Run a retraction test print and adjust the distance by +/- 0.2mm until stringing is minimized.
Cooling
- Symptom: Overhangs and bridges droop or curl upwards. Small, fine features look melted.
- Diagnosis & Fix: Most slicers control the part cooling fan speed. For PLA, you generally want 100% cooling after the first few layers. For materials like ABS and ASA, you want less cooling (or none at all) to prevent warping and cracking. If overhangs are poor, try reducing the print speed specifically for overhangs in your slicer settings.
Category 4: Model Failures (The Source File)
This is the least common category, but it can be confusing when it happens. The issue is not with your printer or your settings, but with the 3D model file itself.
Key Symptoms:
- The slicer software gives “non-manifold” errors or other warnings and fails to generate G-code.
- The sliced preview shows missing walls, random holes, or bizarre geometry not in the original model.
- The print has inexplicable gaps or thin, broken sections.
The Diagnosis & Solution: Repair the Mesh
STL files are just a collection of triangles (a mesh). Sometimes, this mesh can have errors.
- Non-Manifold Geometry: The model has holes, making it impossible for the slicer to determine what is “inside” versus “outside”.
- Flipped Normals: Some triangles are facing the wrong way, confusing the slicer.
- Zero-Thickness Walls: Features are defined as a 2D plane with no thickness.
Fix: Most of these issues can be fixed automatically. Import your STL into a program like Windows 3D Builder (free with Windows) or Meshmixer and use their repair functions. 3D Builder’s “Fix model” button is remarkably effective. After repairing, export a new STL and try slicing it again.
By methodically working through these four categories, you can diagnose any print failure with confidence. You save time, filament, and frustration by confirming your material and hardware are sound before ever touching a slicer setting. Happy printing.