
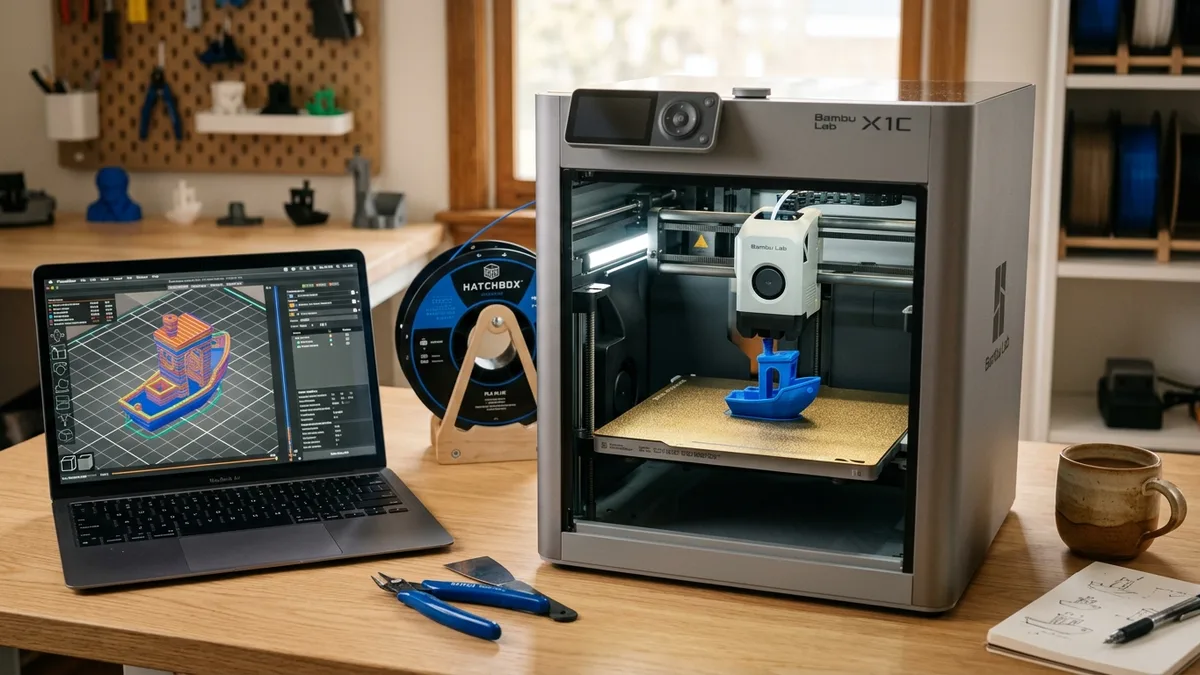
3D printer troubleshooting is the systematic process of diagnosing and resolving printing failures to achieve high-quality output. This diagnostic process categorizes issues into hardware malfunctions, material degradation, and incorrect slicer configurations. Identifying the specific symptoms allows users to apply targeted solutions instead of random adjustments. The following sections explore the common 3D printing problems and solutions, detail the types of print failures, and explain how equipment quality impacts diagnostic frequency.
What are the common 3D printing problems and solutions?
Common 3D printing problems and solutions involve extrusion issues, adhesion failures, and dimensional inaccuracies. These problems are categorized below.
- Extrusion failures during initial layers or mid-print.
- Bed adhesion issues resulting in detached or warped bases.
- Stringing and oozing across travel movements.
- Layer separation and splitting due to thermal inconsistency.
- Layer shifting caused by mechanical binding or loose belts.
- Gaps between infill and perimeter walls.
Understanding these specific symptoms provides a foundation for targeted diagnostics.
Why is my 3D printer not extruding at the start of a print?
A 3D printer is not extruding at the start of a print because the nozzle distance is too close to the build plate, the hotend is clogged, or the extruder gear is stripped. The distance between the nozzle tip and the print bed must allow melted filament to flow freely. If the nozzle scrapes the glass or PEI sheet, the backpressure prevents material deposition and grinds the filament against the drive gear. According to NinjaTek documentation, adjusting the Z-offset by increments of 0.05 mm restores proper clearance and allows the plastic to adhere without blockage. A clogged nozzle requires a cold pull technique or a temperature increase to melt residual carbonized plastic trapped inside the melt zone. NinjaTek specifies a maximum nozzle temperature of 250°C for their flexible materials during clearing procedures to prevent PTFE degradation in standard hotends. Stripped extruder gears happen when the motor grinds against stationary filament due to a downstream blockage or excessive tension. Cleaning the gear teeth with a brass wire brush removes plastic dust and restores grip on the incoming filament strand. The initial priming line sequence programmed into most slicing software helps purge old material and establishes stable pressure inside the nozzle before the actual model begins printing.
Why is the first layer not sticking to the bed?
The first layer is not sticking to the bed due to an incorrect Z-offset, an unlevel build surface, or residual grease on the plate. An optimal Z-offset presses the filament into a slightly flattened oval shape against the bed, maximizing contact area without digging into the surface. An unlevel bed causes the nozzle to deposit material into the air on one side while scraping the plate on the other side, resulting in inconsistent adhesion across the build area. Dirt, skin oils, or dust on the build surface reduce the surface energy required for plastic adhesion. Adjusting the bed temperature between 80°C and 110°C, depending on the material specifications from manufacturers like Bambu Lab, improves thermal bonding for high-temperature filaments by keeping the plastic above its glass transition temperature. Applying a thin layer of PVA glue stick, liquid bed adhesives, or blue painter’s tape provides a chemical bonding interface that grips the molten plastic. Washing the build plate with warm water and unscented dish detergent removes oils better than isopropyl alcohol wipes, restoring the natural grip of textured PEI or glass surfaces. Proper first layer adhesion prevents warping and model detachment later in the print cycle.
What causes stringing or oozing in 3D printing?
Stringing or oozing in 3D printing is caused by insufficient retraction settings, excessive hotend temperature, or slow travel speeds. Retraction pulls a small length of filament backward into the melt zone to relieve pressure when the printhead moves over open spaces between printed islands. If the nozzle temperature exceeds the material’s ideal melting point, the plastic becomes too viscous and drips out regardless of the retraction pressure relief. Adjusting the printing temperature downward gradually identifies the optimal thermal threshold for reducing oozing without causing under-extrusion. Flexible materials like TPU are highly susceptible to stringing because the soft filament compresses inside the Bowden tube, which delays the retraction response at the nozzle. Increasing travel speed minimizes the time the nozzle spends crossing open air, which gives the molten plastic less opportunity to drip onto the part. Fine-tuning the retraction distance prevents excessive material accumulation on the outer walls. Enabling settings like wipe while retracting or coasting in the slicing software further reduces pressure buildup before travel movements begin.
Why are the layers separating and splitting?
Layers are separating and splitting because the ambient printing temperature is too low or the part cooling fan operates too aggressively. Proper layer adhesion requires the previously deposited plastic line to remain partially molten when the new layer extrudes on top of it. If the lower layer cools too rapidly, the thermal bond fails, and the part splits along the horizontal axis under minimal physical stress. Increasing the hotend temperature gradually improves the melt flow and thermal blending between stacked layers, creating a stronger mechanical bond. Reducing the part cooling fan speed prevents cold drafts from freezing the plastic prematurely, especially on large models that require extended layer times. Enclosed 3D printers trap ambient heat inside the chamber, which maintains a stable environment for engineering materials like ABS, ASA, and Polycarbonate. Printing with large nozzles or thicker layer heights also increases the thermal mass of each extruded line, which slows down the cooling process and promotes better fusion between adjacent layers.
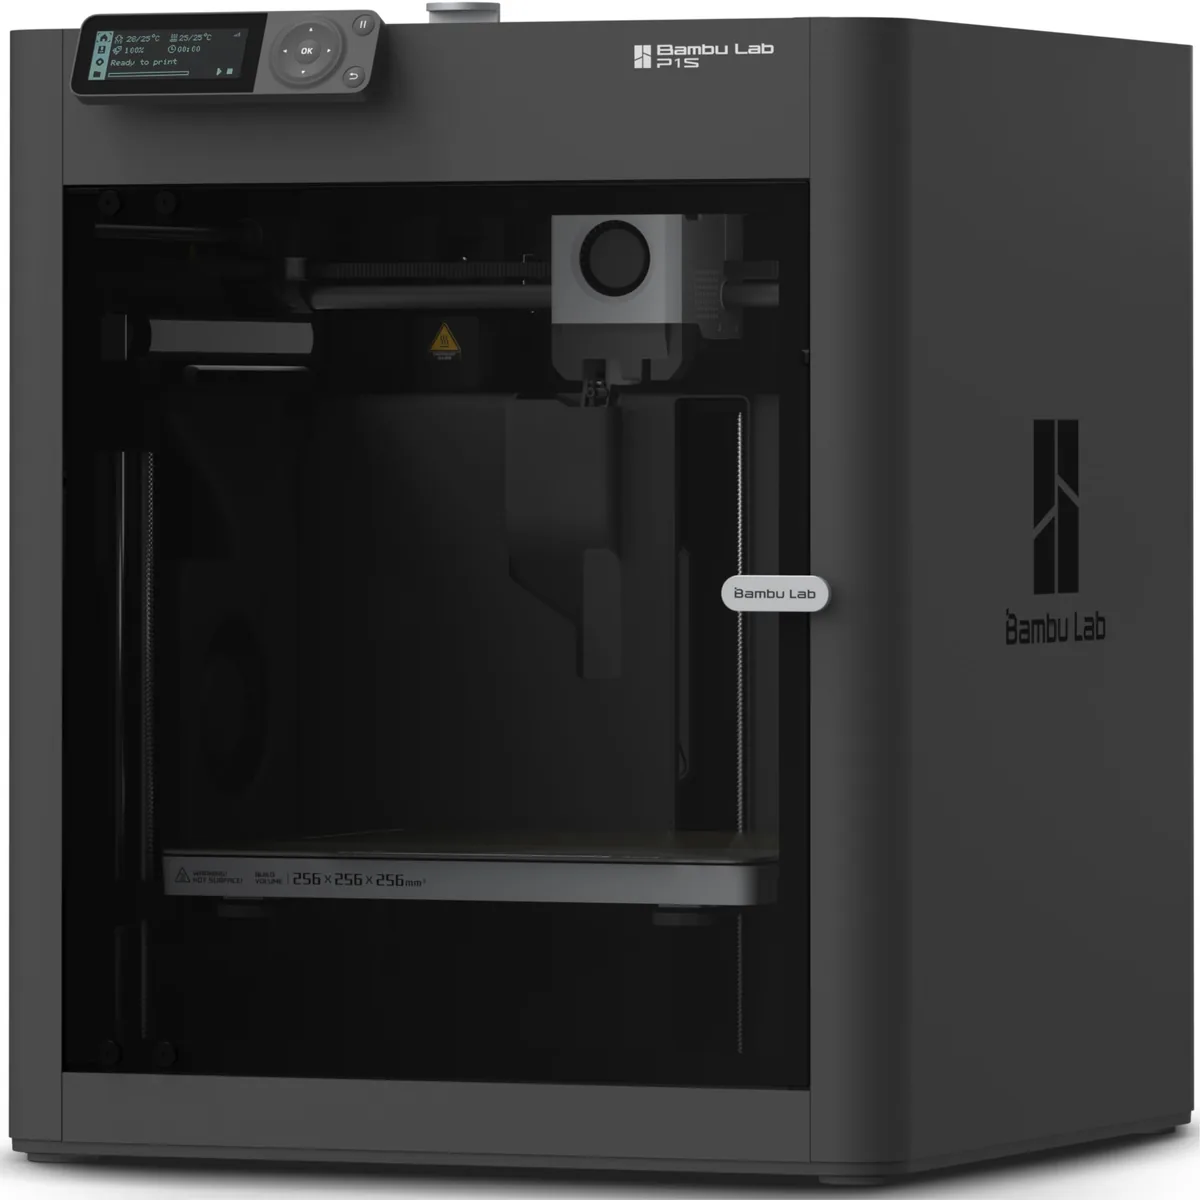
Bambu Lab P1S Enclosed 3D Printer
Pros
- Fully enclosed CoreXY chassis with auxiliary cooling fan
- Seamless multi-color / multi-material integration with Bambu AMS
- Reliable out-of-the-box first layers with dual automated bed leveling
- Active vibration compensation and belt tension monitoring
Cons
- Proprietary closed ecosystem
- Chamber is passively heated by the bed rather than a dedicated PTC heater
- Upgrading to hardened nozzle for carbon fiber requires separate swap
How can I fix layer shifting in a 3D print?
Layer shifting in a 3D print is fixed by tightening loose timing belts, loosening over-tensioned belts, or reducing print acceleration values. A loose belt skips teeth over the stepper motor pulley during rapid direction changes, causing the printhead to lose its coordinate tracking. An over-tightened belt strains the motor bearings and causes the stepper motor to miss electrical steps under heavy load, resulting in a sudden shift on the X or Y axis. High print speeds combined with extreme acceleration profiles exceed the mechanical limits of the motion system, forcing the carriage out of alignment during sharp corners. Inspecting the motion system for physical obstructions, such as fallen printed supports, tangled cables, or blobs of extruded plastic, prevents the carriage from crashing and losing its position. Maintaining high-quality 3D Printer Parts & Accessories ensures smooth linear motion and reduces the likelihood of skipped steps caused by worn V-slot wheels or dry linear rails. Reducing the travel acceleration in the slicer software prevents the motors from demanding more torque than the electrical system can provide.
What causes gaps between infill and outline?
Gaps between the infill and the outline are caused by insufficient infill overlap percentages or excessive infill printing speeds. The slicer software determines how far the internal infill lines penetrate the inner perimeter wall to create a physical bond. Increasing the infill overlap setting pushes the infill deeper into the perimeter layers for a solid mechanical connection. If the infill printing speed is significantly faster than the perimeter speed, the extruder struggles to push enough plastic during rapid zigzag movements, resulting in under-extrusion at the junction points. Reducing the infill printing speed allows the hotend pressure to stabilize and ensures consistent material flow where the infill meets the exterior shell. Simplify3D documentation recommends verifying that the extrusion multiplier is calibrated correctly, as general under-extrusion often manifests first as gaps at the intersection of thin structural walls and dense infill patterns. Upgrading to a high-flow hotend maintains consistent pressure during high-speed infill operations, preventing the extruder gear from skipping or grinding the filament.
What are the types of 3D print failures?
The types of 3D print failures are categorized into hardware malfunctions, material degradation issues, and slicer settings errors. This classification system isolates variables to speed up the diagnostic workflow and prevents users from making unnecessary software adjustments for physical mechanical problems.
Hardware Failures
Hardware failures include clogged nozzles, faulty thermistors, and binding motion systems. A nozzle clog physically blocks molten plastic, while a broken thermistor reports incorrect temperatures and triggers thermal runaway protection halts. Worn Bowden tubes create friction that resists filament movement, leading to inconsistent extrusion across the entire print. Upgrading to reliable components reduces the frequency of these mechanical breakdowns, and understanding how to compare 3D printers helps identify machines with superior hardware tolerance and better quality control. Regular maintenance routines, such as lubricating lead screws and checking belt tension, prevent gradual mechanical degradation from ruining long printing sessions.
Material Issues
Material issues stem from moisture absorption in hygroscopic filaments like PLA, PETG, and TPU, or mechanical tangles on the spool. Water molecules trapped inside the filament boil upon entering the hotend, causing popping noises, poor surface finish, and brittle layers that snap easily. Drying the filament eliminates these moisture-induced defects before printing begins.
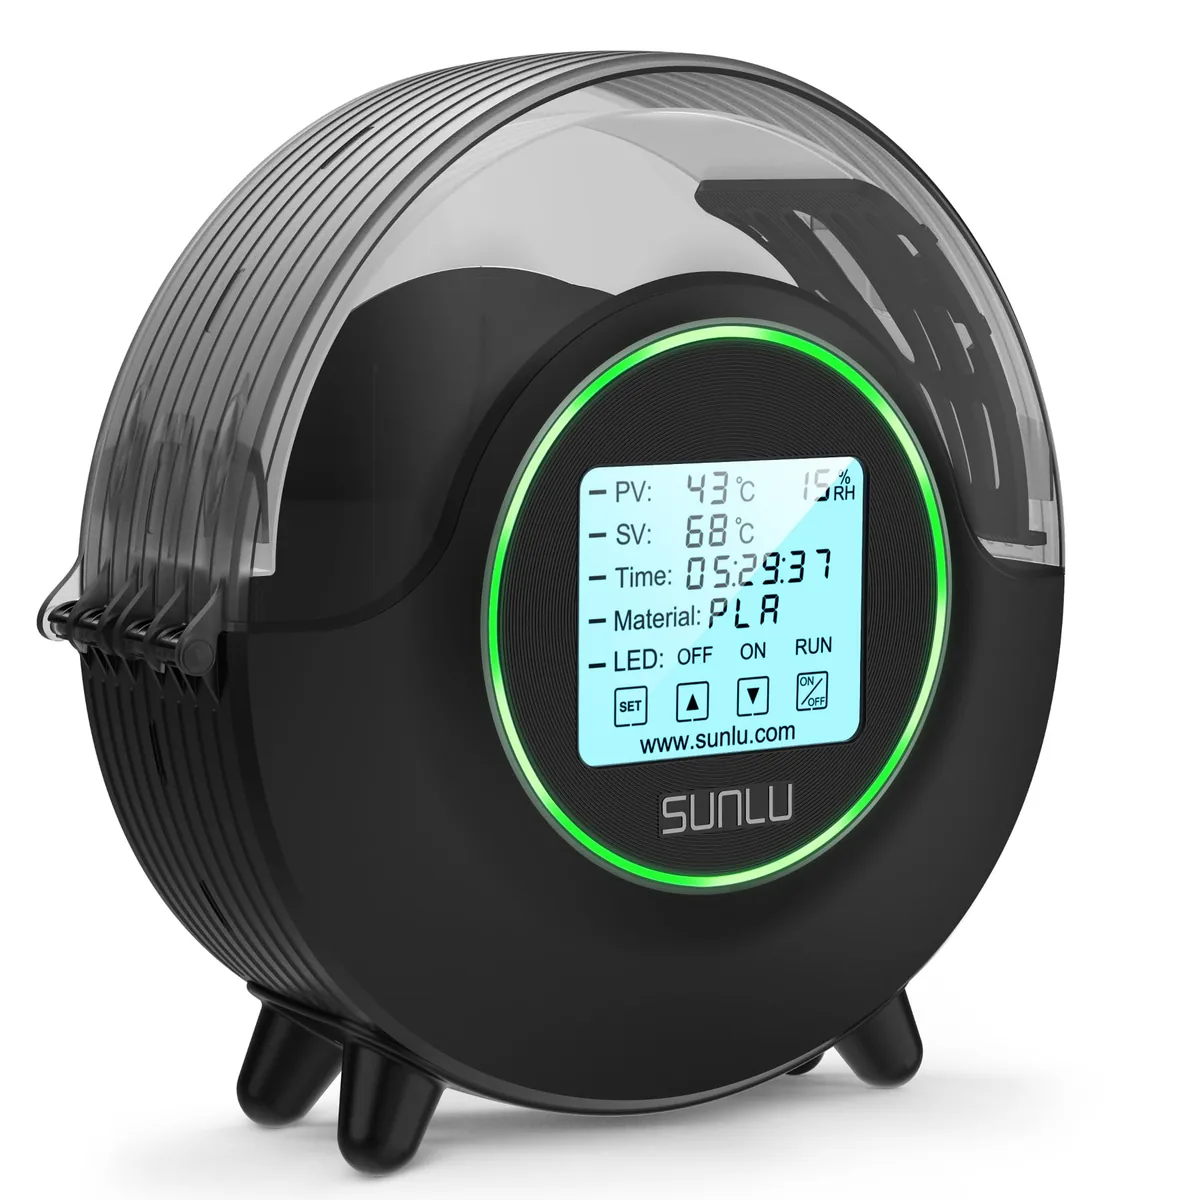
SUNLU S2 Upgraded Filament Dryer (with Fan)
Pros
- 70°C maximum temperature ceiling safely dehydrates Nylon (PA), PC, and TPU
- Upgraded internal circulation fan prevents localized scorching, 4.6” circular touchscreen display with ambient LED status ring
- Very quiet operation (~40 dB) suitable for bedroom or office workstations
Cons
- Humidity sensor measures air pocket near the bottom rather than spool core
- Moisture vapor venting requires cracking the top seal during the first hour of drying
According to SUNLU, drying materials in a dedicated dehydrator at 70°C restores printability and prevents stringing caused by steam pressure in the hotend. Tangles occur when the loose end of the filament crosses under another coil, creating a knot that stops the extruder from pulling material and causes the printer to print in mid-air. Storing unused spools in vacuum-sealed bags with desiccant packs preserves material integrity and prevents dust accumulation from clogging the nozzle diameter.
Slicer Settings Errors
Slicer settings errors result from incorrect temperature inputs, inaccurate flow rate multipliers, or inappropriate print speeds. Slicing software translates digital 3D models into sequential G-code instructions using user-defined parameters for the specific machine. Setting a temperature below the manufacturer’s recommended range causes under-extrusion and weak layer bonds throughout the model. An incorrect flow rate multiplier forces the extruder to push too much or too little plastic, leading to dimensional inaccuracies where parts fail to fit together. Printing outer perimeters too fast degrades surface quality and introduces ghosting artifacts near sharp corners.
How does a 3D printer ownership cost affect troubleshooting frequency?
A 3D printer ownership cost affects troubleshooting frequency because higher initial investments typically include advanced sensors, closed-loop stepper motors, and automated calibration routines that prevent failures. Budget machines require manual bed leveling, frequent belt tensioning, and constant Z-offset adjustments to maintain acceptable print quality. Premium models utilize strain gauges and camera vision to achieve perfect first layers autonomously and detect failures before they waste material. Factoring in the 3D printer ownership cost reveals that spending more on initial hardware drastically reduces the hours spent diagnosing failed prints, clearing clogged hotends, and replacing worn consumable parts. Machines with premium components isolate the user from raw mechanical tuning, shifting the troubleshooting focus entirely toward basic slicer optimization and filament drying.