
Washing and curing resin 3D prints safely requires using personal protective equipment (PPE), executing a controlled part removal, washing with an appropriate solvent, drying the part completely, and applying UV curing. The part that emerges from the vat is chemically incomplete and unsafe to handle. It is covered in uncured liquid resin, a toxic substance. The next steps, washing and curing, are critical for achieving the final material properties and dimensional accuracy of your part.
This lab protocol details the correct, safe, and repeatable steps to post-process your resin 3D prints. Following this guide will protect your health and produce strong, high-quality finished parts. These post-processing steps apply universally, regardless of which best resin 3D printer you operate.
Protocol 1: Personal Protective Equipment (PPE) is Non-Negotiable
Personal Protective Equipment (PPE) including nitrile gloves and safety glasses must be worn before interacting with uncured resin to prevent contact dermatitis and respiratory irritation. Uncured photopolymer resin is a skin irritant and a sensitizer. Repeated exposure can lead to contact dermatitis. Its fumes can also irritate your respiratory system.
The necessary protective gear for handling uncured resin includes:
- Nitrile Gloves: These are a must. Not latex or vinyl. Nitrile offers the best chemical resistance to the monomers in UV resin. Have multiple pairs ready. If you get resin on your gloves, remove them carefully and put on a new pair.
- Safety Glasses: Protect your eyes from accidental splashes. Goggles that form a seal are even better.
- Well-Ventilated Area: Work near an open window with a fan or in a room with an active air-extraction system. A dedicated enclosure with carbon filtering is the gold standard.
Your health is more important than any print. Do not skip this step.
Protocol 2: Part Removal and Initial Drip
Part removal begins by allowing the build plate to drip excess resin back into the vat at an angle before transferring the print to a washing station. Your goal is to recover as much of it as possible and minimize the mess.
- Raise the Plate: Use the printer’s controls to raise the build plate high above the vat.
- Angle and Drip: Loosen the build plate knob and tilt the plate to a 45-degree angle. This allows resin to drip from a corner back into the vat. Let it drip for at least 5 to 10 minutes. Patience here saves resin and reduces the amount of cleaning solvent you’ll need.
- Scrape (Optional): Use a plastic or silicone spatula to gently scrape excess resin from the top of the build plate back into the vat. Never use the metal scraper for this; it will damage your FEP or nFEP film.
- Remove the Plate: Place the build plate on a silicone mat or a tray lined with paper towels to catch any remaining drips. Move it to your designated washing station.
Protocol 3: The Washing Process
Washing removes all residual liquid resin from the surface of the part. If you skip this or do it poorly, your final part will be sticky and lack surface detail. You have two main options for a solvent: Isopropyl Alcohol (IPA) or water (for water-washable resins).
Using a Dedicated Wash & Cure Station
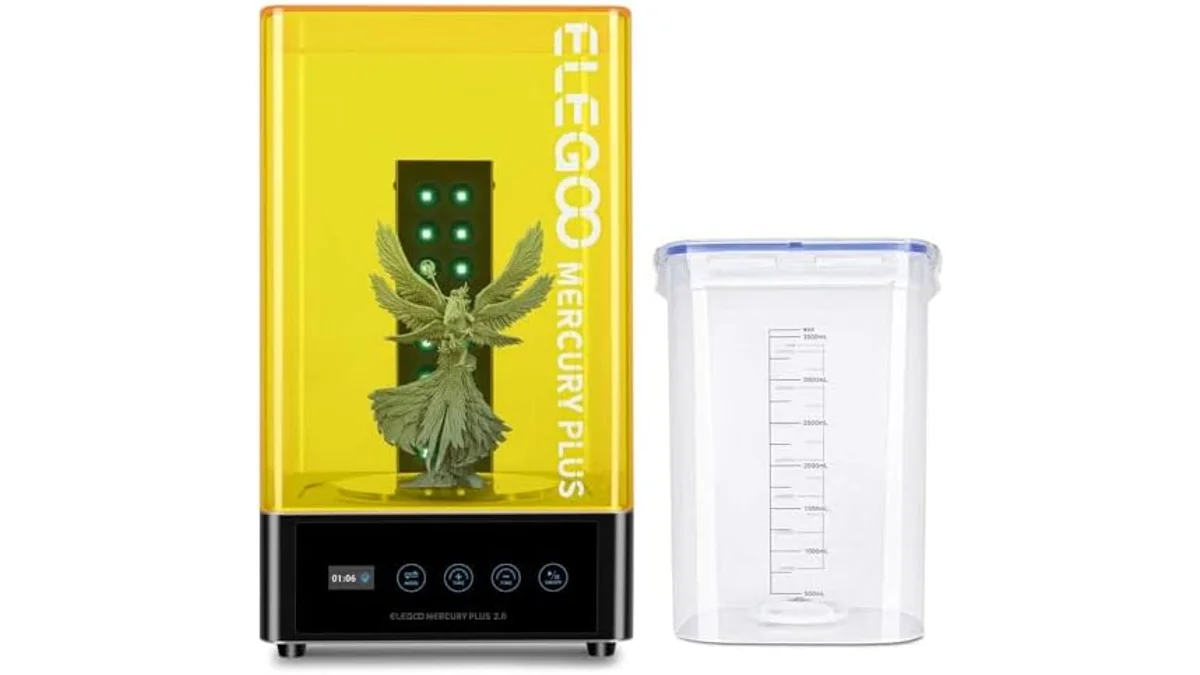
For consistent results and a cleaner workflow, a dedicated wash and cure station is the best tool for the job. These units automate the washing process with a magnetic stirrer and a sealed container.
The procedure for using a dedicated wash station involves:
- Prepare the Wash Bucket: Fill the wash station bucket with your chosen solvent. For standard resins, use 91% or higher Isopropyl Alcohol (IPA). Lower concentrations contain too much water and are less effective. For water-washable resins, use clean tap water.
- Remove the Print: Using your metal scraper, firmly but carefully pop the print off the build plate. For stubborn prints, a flexible magnetic build plate is a great upgrade.
- Load the Basket: Place the printed parts into the wire washing basket. Do not overcrowd it. If washing a large part, you may be able to mount the entire build plate directly to the station’s arm.
- Set the Timer: A typical wash cycle is 2 to 5 minutes. Do not wash for more than 10 minutes. Over-washing, especially with IPA, can cause the part to absorb the solvent, swell, and become soft or brittle.
- Run the Cycle: Submerge the basket and start the wash cycle. The magnetic stirrer will create a vortex, cleaning the part thoroughly.
Manual Washing Method
The manual washing method using two lidded containers involves:
- “Dirty” Bath: Fill the first container with IPA or water. Place your part inside and gently agitate it for 2 to 3 minutes. Use a soft brush to gently scrub complex geometries and remove trapped resin.
- “Clean” Bath: Move the part to the second container, which holds fresh, clean solvent. Agitate for another 1 to 2 minutes. This two-stage process ensures a perfectly clean surface.
This method works, but it is messier and requires more direct handling of solvents.
Protocol 4: Drying The Part
Drying the part completely with compressed air or an air dry method is mandatory before UV curing to prevent cloudy, white residue. Curing a wet part traps moisture or solvent on the surface, resulting in a white, chalky residue that ruins the finish.
- Best Method: Compressed Air. Use a can of compressed air or an air compressor set to a low PSI to blow all the solvent off the part. Pay close attention to crevices, holes, and fine details. This is the fastest and most effective method.
- Alternative: Air Dry. Place the part on a clean paper towel and let it air dry for at least 30-60 minutes. The part is fully dry when it no longer looks glossy or wet and there is no residual solvent smell.
Protocol 5: The Curing Process
Curing exposes the washed and dried print to a 405nm UV light source for 3 to 10 minutes to complete the chemical reaction and solidify the part. A dedicated curing station with a turntable and a specific UV wavelength (405nm is the standard for most resins) bombards the part with UV light. This completes the chemical reaction, solidifying the part and maximizing its strength and hardness.
The workflow for curing parts in a dedicated station involves:
- Place the Part: Put the completely dry part on the station’s turntable.
- Set the Timer: Curing time depends on the resin, the part’s size, and its wall thickness:
- Small, solid miniatures: 2-3 minutes.
- Medium-sized parts: 4-6 minutes.
- Large, thick parts: 8-15 minutes.
- Start Curing: Place the UV-blocking cover on the station and start the cycle. The turntable will rotate the part for even exposure.
- Check for Stickiness: After the cycle, put on a clean pair of gloves and touch the part. If it feels even slightly tacky, it needs more curing. Flip the part over or reorient it and run another short cycle (1-2 minutes).
For more info on different resin types and their properties, see our guide in the filaments and resins category. These safety rules apply to all resin 3D printer guides operations.
Post-Curing Supports
It is often easier to remove supports after curing. Cured supports are more brittle and snap off cleanly. Use a sharp pair of flush cutters. Removing supports before curing can be a sticky mess and may deform the soft, uncured part.
Safety and Best Practices: A Summary
Safe washing and curing consolidates protective equipment, proper solvent use, and calibrated UV exposure into a repeatable workflow.
| Parameter | Suboptimal / Dangerous | Recommended Lab Protocol |
|---|---|---|
| PPE | Bare hands, no glasses | Nitrile gloves, safety glasses |
| Ventilation | Sealed, small room | Active exhaust or open window w/ fan |
| Washing Solvent | <90% IPA, dirty water | 91%+ IPA, or clean water for WW resin |
| Wash Time | >10 minutes | 2-5 minutes |
| Drying | Curing while still wet | 100% dry via compressed air or air dry |
| Curing Light | Generic UV flashlight, sunlight | 405nm curing station with turntable |
| Curing Time | <1 minute or >30 minutes | 3-10 minutes, depending on part size |
| Disposal | Pouring down the drain | Cure liquid waste into a solid, then trash |
Following a strict, repeatable process protects you from harmful chemicals and ensures every part you produce is strong, detailed, and ready for use. Treat your workspace like a lab, and you will get professional results.